Reasons Why Bike Tires Won’t Inflate | Solutions
Everyone needs to pump up their bike tires at some time during their biking journey, irrespective of whether they are experienced cyclists or are just getting out. However, one of the major problems with this is when your bike tire won’t inflate, and it either won’t let up at all or won’t hold air! Pumping bike tires is a task that no cyclist appreciates.
However, if you’re going for a long time, the effects of your bike’s tires not completely inflating could lead to more suffering. A tube that has been ruptured or a damaged pump are just two options for the problem. Do not, however, worry; there will always be a solution to any issue.
Table of Contents
Why, Then Your Bicycle Tire Won’t Inflate?
Your flat bike tire won’t inflate due to any of the following six reasons. You might be using the wrong pump head for your valve stem type, you might have the pump installed incorrectly, your valve stem might well be damaged, your tire could have a leak, your pump might be compromised, or if you’re going tubeless, it’s likely that your bead isn’t set correctly.
We will explore them in more detail, working our way up from the ones that are the easiest to recognize and solve. Keep in mind that it is always preferable, to begin with, the most accessible and affordable solutions. Moreover, you will not further question how to fix a bike tire that won’t inflate.
- The Use Of An Incorrect Valve Stem On The Pump.
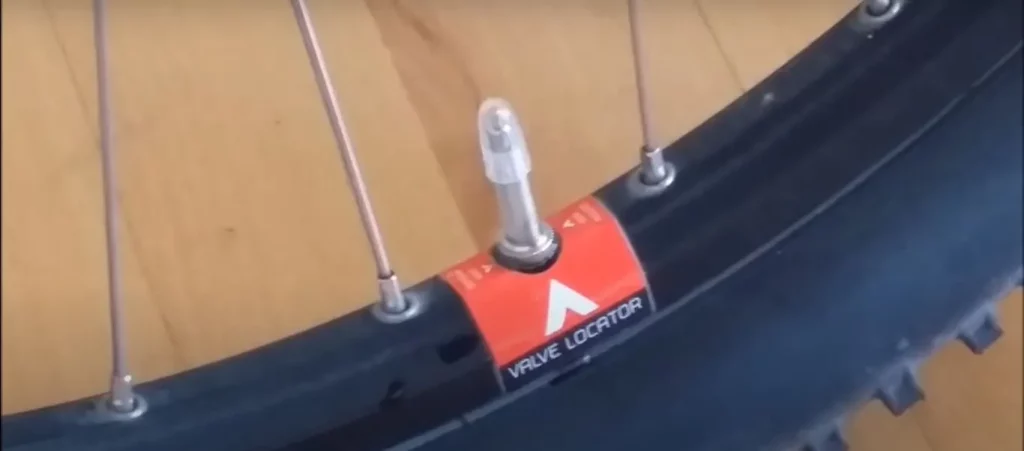
Typically, bikes will utilize one of 2 distinct styles of valve stems! There are two different types of valves: the more unusual but sometimes superior Presta valve, which follows after the standard Schrader valve that most individuals are already familiar with.
This distinction demonstrates that the majority of bike tire pumps truly have 2 different valve stem outlets. It’s pretty likely that you are employing the wrong port and that you only have to change it if your tires are refusing to accept air or if anything else feels strange. This problem is the simplest to identify and most likely the quickest to fix if it is one you are facing.
- Pump Installed Improperly
Now that you’ve made sure your pump’s port is being used properly, excellent work! If you notice that when you use that port, there is a hissing noise coming from it, it’s very likely that the pump or compressor is simply positioned wrongly on the valve stem, allowing air to leak from the tires before it can access it.
Take some time to unscrew the pump from the valve stem and then reattach it if you hear the hissing coming from that area. In order to prevent air from starting to escape, you should make sure it rests level and suitably low.
There is a problem that arises when your tire is totally flat, which is a difficulty that individuals frequently encounter. When this transpires, the valve is likely to push itself downward into the tires rather than stay in place, making it challenging to place the pump on this stem properly. As you exert pressure with the pump, in this case, hold the valve stem in position by placing your hand on the tire’s opposite side while doing so.
- The Valve Stem has Defected
Now, if you are definitely sure that you have placed the pump correctly and you are still experiencing a whistling sound coming from the valve stem region, you may simply have a broken valve stem. Unfortunately, this is only the beginning phase of the problem when cash will have to be paid to fix it.
If you have an older bike tire, the material at the bottom of the valve stem will also have burnt up over time from being used, and it is only a matter of time before it breaks. It’s standard practice to do this when maintaining bikes.
But then, how do you fix a faulty valve stem? The best action to take if you are using a tube in your tires would be to fully replace the tube since new ones will also come with a new valve stem to replace the old one eventually. Simply ensure that the tire you buy has the same dimension and valve stem style as the one you originally had to ensure the correct fit.
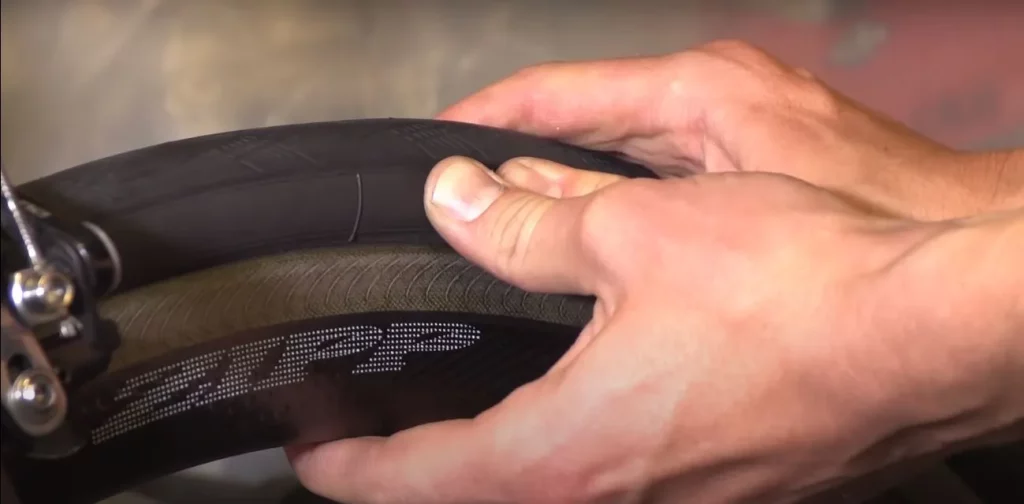
- Rupture In The Bike Tire
Perhaps the one that many individuals are acquainted with is this one! A cut or rupture in the tubes or tires was created by something harsh you went over or by you compressing the tire between both the ground and your bike wheel. This is an unpleasant element of biking, particularly in the world of mountain biking.
Using a spray bottle filled with a combination of soapy water and water will make it simple to detect whether your tires or tubes have problems. If you observe bubbles emerging from anywhere as you blow it up, there is where the problem is.
Use a tire sealant to fix up any tiny holes in the tires, as this is one of the best ways to deal with this issue. When you are riding, these lubricants will flow around inside the tires or tube, identify the problem, and afterward seal it. Now, if somehow the damage is severe enough, you’ll definitely need to change the tires or tube immediately. In this scenario, you can get new tubes, and if you choose to go tubeless, you’ll also necessitate a new tire.
- Faulty Compressor Or Pump
The pump or compressor in your home or workplace may be the cause of another frequent problem that has absolutely nothing to link with the bike directly. Even when you have executed the directions to the letter, it is still conceivable that something has gone horribly wrong, and the tires are not getting air.
The most straightforward approach to determine if this is the fault is to hold the pump tube far from the valve stem, engage the compressor, or press it down on the pump to determine if you can sense or hear some air flowing out of it.
If your electronic compressor seems significantly louder than usual, that is a classic clear indication that the compressor has collapsed. This is another simple way to identify.
- Not Properly Sealed Tubeless Beads On Bike Tires
This problem occurs quite frequently, in fact. However, it also affects a more particular group of riders, so it is less commonly encountered as a whole. This is the main reason why this reason comes last on the list. Mountain bikers occasionally choose to ride tubeless, which implies that the motorcycle tires themselves are inflated with air instead of using a tube.
In this instance, the wheels’ bead is created by the tires themselves with the assistance of specific tape. Air will, however, escape if this bead cracks or if there isn’t enough tension to push the tire against the wheel sidewalls.
To acquire the proper fitment, you will effectively need to detach your tire and reassemble it if this appears to be what is happening to you.
How to Ensure Proper Bike Tire Inflation
You can probably solve your problem by quickly reviewing how to properly inflate both kinds of tires. Somewhat more complicated than simply turning the pump on and off is inflating your tires. Although it’s a simple task, there are several elements that are simple to overlook. Let’s get started:
Bike Tires With Schrader Valves
It’s pretty easy to fill Schrader valves, and they’re immensely popular. For instance, these are the same valve that is used in car tires.
Only carry out the following steps:
- Take off the valve’s cap.
- The valve should receive pressure from the hose end. When you have two outputs for separate valves, the side that is functional with Schrader valves is the bigger of the two.
- The hose’s end lever should be moved. The majority of the time, it will land parallel to the stem.
- Use a tire gauge or the gauge on the pump to inflate the tire to the required pressure.
- Reposition the lever, so it is in the open spot, then take the hose off.
- On your subsequent ride, change the cap to prevent debris from entering the valve.
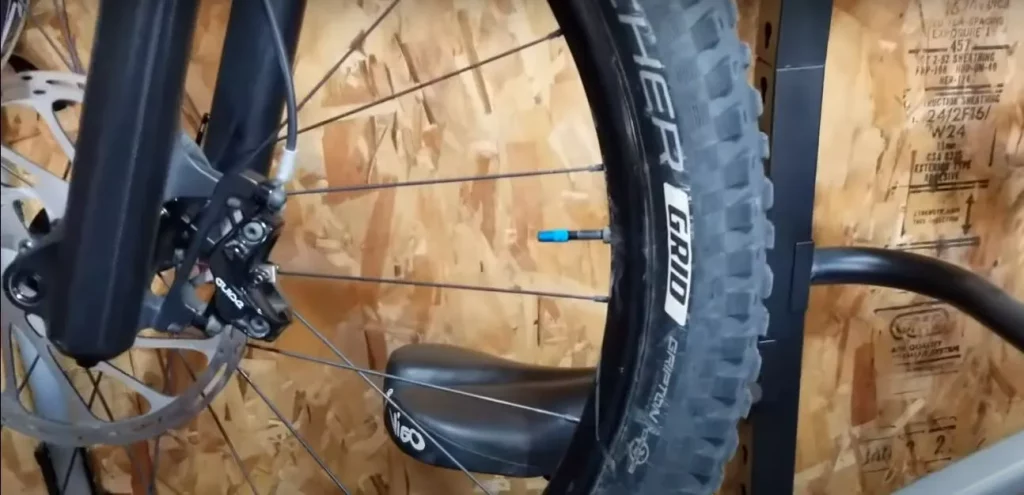
Bike Tires With Presta Valve
It can be a little tricky to fill Presta valves, which are commonly seen on expensive bike tires.
- The valve can be seen once the cap has been removed from the stem.
- By rotating it to the left, unlock the Presta valve. If the top begins to release air when you press on it, you are about to start filling the tire.
- Then, lock the lever into place after placing the pump’s nozzle over the valve.
- Once you reach the recommended pressure for your riding, refill the bike tire.
- In order to remove the nozzle from the tire stem, depress the lever.
- By turning the Presta valve anticlockwise, you can seal it. Be sure that there is no air release by putting pressure on the top.
- The stem cover on the bike should be replaced.
Prevention Techniques To Use After Bike Tire Repairs
After repairing a slow leak in a bike tire, there seem to be three steps to follow. Find a secure location first, then fasten yourself across the handlebars or with your arms so that, in the case of a flat, you can keep riding while avoiding obstacles till help comes. We usually put on safety gear when repairing our bikes for the same purpose.
Replace both tubes with new ones that are the same size next. Refrain from refilling one tube with air as this may lead to uneven stress distribution, which will end up making riding overall uncomfortable and potentially deadly in the future.
Last but not least, but no less crucially, make sure you get the finest complete suspension mountain bike. Only then can you avoid having your bike tire deflate overnight?
FAQs:
Can a bike tire become flat without being punctured?
Sometimes bike tires simply go flat, regardless of whether there is anything wrong with the tire or tube. Most of the time, this occurs when a bike has been resting for a while!
Over time, air will escape, resulting in a flat tire. You ought to be able to pump it up and carry on your journey without any problems so that it hasn’t been too prolonged and the wheel hasn’t pinched the tube.
What gives me pinch flats so frequently?
When bikers decrease the PSI in the tires to increase the tire’s contact area with the ground, they often get pinch flats. The drawback to this is that if you strike a root or a bounce too hard, it could result in pinching flats.
How much pressure can my road bike tires have?
The PSI requirements for road bike tires are among the highest of any kind of bike on the roads! For the lowest number of rolling resistance, they need a minimum of 90 pressure, but they are capable of going as much as 120 psi.
Why won’t my inner tube inflate?
It indicates that the pump head and valve are forming an airtight seal, indicating that the valve is not sliding to allow air into the tube. If the valve is a Presta valve, be sure to back off the acorn nut on the head of the valve. Try pushing the center pin down if the valve is a Schrader valve.
Conclusion:
There you have it, then! Now you know why your bike tires won’t inflate and what to do when bike tire won’t inflate. The issue with the pump just not fitting correctly for whatever reason is the problem that most individuals will encounter when their bike doesn’t accept air. However, two likely extra options are a damaged valve stem or a punctured bike tire. Moreover, now you can also quickly fix the tire pressure and follow the preventive measures to avoid any future bike tire issues.