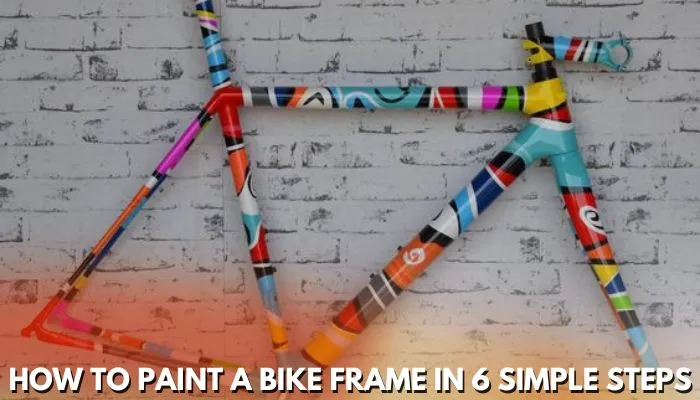
How To Paint A Bike Frame In 6 Simple Steps
Cycling provides a rewarding platform for expressing oneself by choosing a bike that matches one’s preferences and personality. You have two options for this: hire a bike frame painting company or do it yourself.
Table of Contents
Short Answer
If you choose the latter, you’ll have to understand how to paint a bike frame. A bike can be given a brand-new, lustrous appearance by applying many new coats of paint over any old or cracked paint. Fortunately, you don’t have to spend money on a professional to fix your bike. You can paint your bike that looks polished and custom crafted with the correct tools and some spare time.
We’ll go over the precise steps for completing this assignment as well as certain details you should pay particular attention to. Read on to discover more.
How To Paint A Bike Frame
The following is a list of supplies you will need to spray paint a bike frame:
- Paint Colour Primer Paint
- lacquer finish in clear
- Goggles
- Mask (for protection from fumes)
- An area with good airflow for painting
- Sandpaper
- covering stickers for tube gaps
For the sake of simplicity, we’re going to employ spray paint for all three applications in this approach. The bicycle frame should be carefully and uniformly painted.
Step 1: Get The Bicycle Frame Ready

The initial thing you must do is disassemble the bike. Painting will be simpler if you just focus on the frame. Ensure that everything is taken out, such as the cables, so that all that is left is the frame.
Here are a few general instructions for removing the bicycle frame:
- Allen keys are used to remove the wheels.
- To remove the crankset, unscrew the bolts with a wrench.
- To force the bearings out, hammer the bottom bracket.
- Make use of a chain remover to remove the chain.
- Unfasten the stem by using an Allen key. Next, take the fork as well as the headset off.
- The seat post and seat clamp should be loosened.
- You ought to now have a frame that is separated. Keep all of the components you disassembled for reassembly.
Cleaning the frame before continuing is an ideal plan. In order to proceed forward, remove any stickers that may be on the surface. Otherwise, you risk having a surface that is uneven, which will lower the ideal level of your paint in the long run.
Step 2: Sand The Area
Sandpaper is applied to the frame in the following step. This will provide you with a suitable surface on which to put on the paint. It would be challenging for the paint to adhere to the painting surface if you don’t sand the outer layer before repainting the bike frame.
Sanding has the drawback of taking a long time to complete. Fortunately, you don’t need to sand all the way down to the metal’s color; instead, focus on stripping the top layer so a foundation will adhere to it nicely.
Another choice is to take your bike’s frame to a sandblasting shop. It’s a good idea to consider the prices if you’re unsure whether investing in sandblasting is going to be worthwhile. Sanding is going to cost less, but you should plan to work on it for potentially a whole day, whereas sandblasting will cost considerably more, but you will finish it in just an hour.
Step 3: Get Ready To Coat
The frame must now be prepared for painting. Use stickers. However, any covering will do to cover the tube’s apertures to avoid the paint from leaking inside. Keeping the paint contained in the necessary places is always a smart idea.
Putting coverings across your painting area is a good idea to avoid accidentally getting paint on the nearby walls or the work table. Before continuing, be sure to put on a mask.
Step 4: Use A Primer
The primer will be the initial layer we use, and two coats are required. For best effects, make careful to distribute the paint evenly. Let the paint dry after adding the necessary number of coats.
Depending on the type of paint you use, the drying period may vary, but an overnight delay should do the work. It’s also advised to sand the primer-coated surface lightly. Use 800-grit sandpaper for carbon or 300-grit for metal.
Since we simply want as smooth a finish as possible, you can merely concentrate on any unevenly painted areas.
Step 5: Paint The Frame
If you’ve looked into custom bicycle paint schemes, you’ve definitely come across a variety of approaches to completing this phase. However, we’ll keep things straightforward and use only one solid color.
Prior to painting, design stickers can be used. These let you decorate the frame by leaving a pattern behind; they will eventually peel off. When removing the stickers, use extreme caution to prevent damaging the freshly applied color.
The paint application process will mainly resemble that of the priming coat. Be cautious and diligent if you decide to combine different finishes or use an idea you found while researching bike spray paint. When painting in numerous layers, pay attention to the paint order. Likewise, let the frame dry overnight before removing the stickers.
Step 6: Final Touches
The bike frame has to have a clear coat of lacquer applied as the last stage. This will help us get a beautiful finish and seal in the paint. The more challenging aspect is safety. Because lacquer fumes are potent, it’s crucial to have adequate protection and ventilation.
Essential tips for painting a bike frame
Here are some crucial suggestions to take into account when painting a bike frame:
- Pick the appropriate paint
Choose a paint that is made especially for bike frames or metal surfaces. These coatings are designed to adhere to the particular supplies of a bike frame and to be durable. Look for coatings that offer protection against UV rays, chipping, and scratching.
- Prepare the surface as needed
Make sure the bike frame has been well-cleaned and is free of any grime, oil, or outdated paint before painting. After cleaning the frame with a degreaser to get rid of any impurities, rinse it with water. Dry it entirely before continuing.
- Bicycle disassembly
Before painting, it is strongly advised to take apart the bike as much as possible. Take off the drivetrain, wheels, handlebars, pedals, and any other parts that are attached to the frame. This will enable you to paint every part independently and provide a finish that is more even and expert.
- Effectively and the frame
An essential part of the painting process is sanding. It aids in preparing a surface that is rougher for improved paint adhesion. First, sand the surface with medium-grit sandpaper (between 120 and 150 grit). The surface can then be smoothed with fine-grit sandpaper (about 220 to 400 grit). Be thorough, and be sure to sand the entire frame evenly.
- Use appropriate masking methods
Any sections of the frame which you don’t wish to paint should be properly masked off. Cover any sections that should not be painted, such as the headset, dropouts, and bottom bracket, with high-quality masking tape. By doing this, you’ll be able to create crisp lines and avoid overspray or unintentional paint application.
- Put on light coats
When applying it, it is preferable to use several thin coats of paint rather than one thick coat. Thin coatings dry more quickly and lessen the possibility of dribble runs or surfaces that are uneven. Before putting the next layer, let the previous one completely dry. Observe the drying time recommendations provided by the manufacturer.
- Think about using an airbrush or spray gun
While applying paint with a brush can produce fantastic results, utilizing an airbrush or spray gun can result in a finish that is smoother and more uniform. These tools make it easier to maintain control and can give the appearance of professionalism. To prevent overspray or irregular paint application, they do, however, need practice and the right technique.
- Place a clear coat on
Putting a clear coat after the paint has healed is strongly advised. The clear coat strengthens the paint’s endurance by providing an additional layer of protection. Additionally, it offers a glossy appearance. Ad adheres to the manufacturer’s directions for the clear coat treatment and drying times.
- Give drying and curing enough time
When painting a bike frame, patience is essential. Before putting the bike back together, give the paint and clear coat enough time to dry and cure. Rushing the process can result in fingerprints, smudges, or finish damage.
- Reassemble carefully
Put the bike back together gently when the paint and clear coat have thoroughly dried. When tightening bolts, keep an eye on the torque recommendations and check that every component is in the right place. This will protect the bike’s functioning and finish.
You may create professional-looking paintwork on your bike frame by adhering to these suggestions and being meticulous during the procedure.
FAQs
What kind of paint is best for the bike?
Paints come in two basic varieties: glossy and matte. The glossy type is simpler to clean and has additional depth. On the other hand, the matte kind, like matte black paint, hides scratches but may appear chalky.
Can you paint a bike frame by hand?
Thankfully, you are not required to spend money on a professional to fix your bike. You can paint a bike that is going to appear polished and custom crafted with the correct tools and some spare time.
Can you safely spray-paint a bike?
Unfortunately, you can’t just start spray painting a bike frame with paint. Employ a DC Paint Solutions priming aerosol to ensure that any subsequent spray paint you apply will be able to adhere to the surface effectively.
Is bike paint harmed by rain?
A steel frame will rust when exposed to rain, and a structure made of aluminum that is not corrode-proof may also rust. Even though the stainless steel has rust-resistant paint, it could start to flake off after a while in the weather, leaving the bike vulnerable.
Conclusion:
It can be fairly easy to repaint a bicycle frame, albeit it does take a bit of time due to the amount of waiting for paint to cure. You’ll be more than pleasantly surprised by the outcomes, but it is a good pastime. Now that you understand how to paint a bike frame, go forward and try it by yourself.
One Comment