The Best Way To Tighten The Handlebars of Your BMX Bike

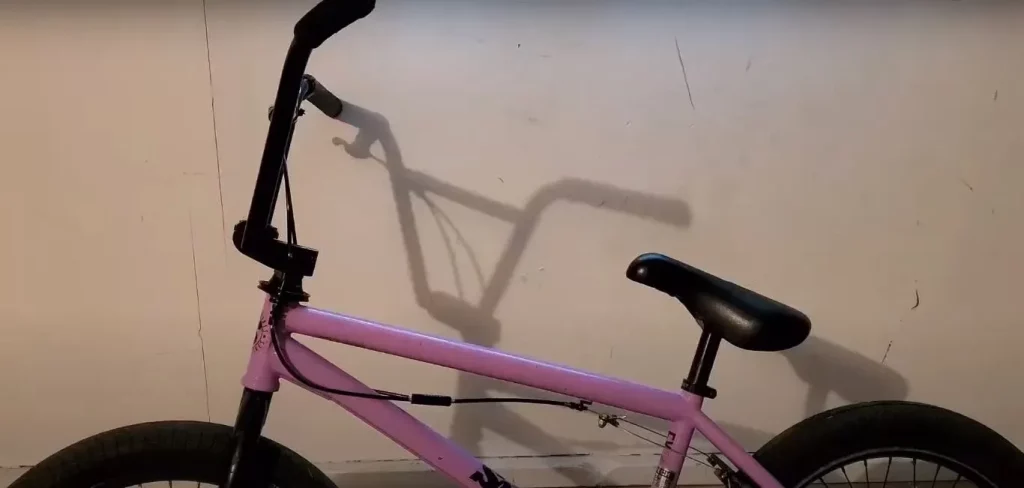
One of the essential aspects of a BMX bike is the handlebars. You may need to replace the handlebars once you’ve been riding the bike for an extended amount of time, or you may need to change the height to match your body size. The handlebars are often set such that they are aligned with the length of your shoulders, which happens to be the favorite position for most people.
How To Tighten BMX Bike Handlebars
Well, it would be best if you modified your BMX bike’s handlebars to your preferences for the optimum level of ease. When your handlebars are appropriately tightened, riding a BMX bike will be the simplest it has ever been for you to execute to your maximum capabilities.
The handlebars on your bike should also be adjusted and tightened as they get older—roughly every twelve months. Therefore, the importance of understanding how to adjust BMX bike handlebars can not be overstated. Consider yourself in the right place if you are inexperienced with the entire procedure since we are going to walk you through an in-depth description of what to do to tighten your BMX bike handlebars.
Table of Contents
How to Tighten BMX Bike Handlebars
As a BMX rider, a slack or spinning handlebar is the absolute last element you are going to encounter. In order to avoid turning and losing control when riding, you must make very sure that your bike handlebar is appropriately secured in place. This is never acceptable for a biker.
However, you can prevent these issues from occurring by tightening the handlebar of your BMX bike. This will keep it in position and avoid it from moving or getting loose when you’re riding, whether it be on flat ground or uneven surfaces.
Thus, you need to know how to tighten BMX bike handlebars The following steps will assist you in tightening the handlebars on your bike:
- Step no. 1
In order to start, you must glance at your BMX bike’s stem design. If your clamp has a single pinch-style bolt (which signifies a quill design) or two bolts that attach a removable faceplate, you should ascertain which form it is as you examine it (this shows a threadless design). A faceplate with four screws is a specification on some BMX bikes.
- Step no. 2
After identifying the form of your BMX bike’s stem, the subsequent step is to straddle the bike’s front wheel and place your handlebars horizontally in the middle.
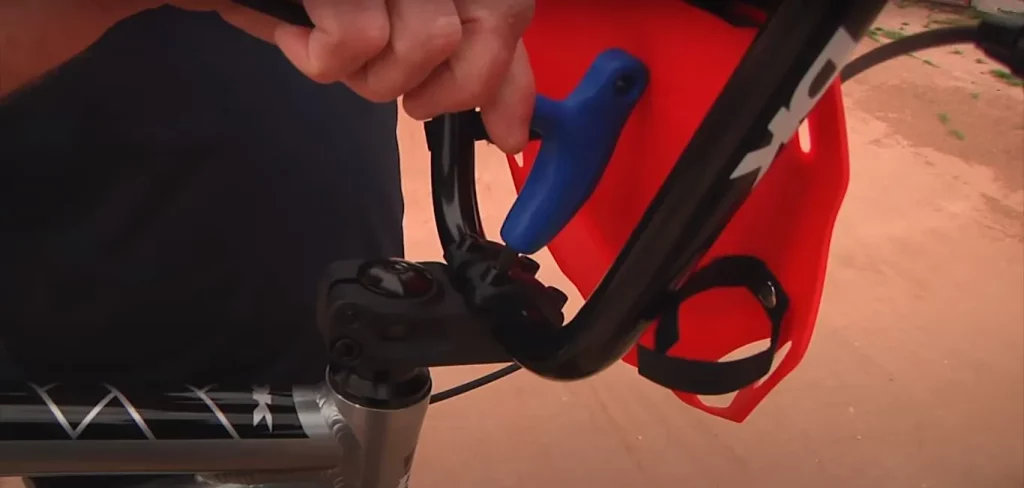
Consider using your eyes to determine if they are uniformly and precisely aligned on both ends of the stem as you are doing this. After that is complete, a single pinch bolt should then be softly tightened using a 6mm wrench, and a double faceplate screw should be gradually tightened using a 5mm tool.
When maintaining a horizontal angle for the handlebar, you should prevent overtightening it and leave enough room for further rotary modification.
- Step no. 3
Ensure the handlebars are appropriately turned so that the ground and the bottom of the drops are leveled. Once you’ve finished doing that, you may continue to tighten the handlebar’s bolt all the way by twisting the wrench hard against the bolt.
Make sure to uniformly tighten each bolt so that the distance between it and the stem stays the same. Once you are done, your BMX bike’s handlebars will be tightened entirely and appropriate for riding on almost any ground, regardless of whether it’s rough or smooth.
Fixing a Distorted or slanted BMX Bike Handlebar
When a BMX bike crashes, is mistakenly tipped over, or is dropped on its side, the bolts can come loose. This will end up causing the handlebars to become uneven or bent.
The handlebar of a BMX bike is typically fastened to the bike with three bolts. The BMX handlebar is fastened to a headset by one to two handlebars, and the headset screw connects the handlebar with the frame.
When you adhere to these key considerations to the closest, mending a misaligned BMX bike handlebar is relatively simple and easy to execute;
- Step 1
The very first step you should do is put a 5mm Allen key into the bolt securing the handlebar mount on your BMX bike and turn it anticlockwise to loosen. In the case that the bolts are tiny, you can think about upgrading to a 6mm Allen key.
- Step 2
After you’ve finished with Step 1, you ought to employ a 5mm or 6mm Allen key to loosen the headset clamping bolt. This bolt, also known as the expander bolt, is frequently used to tighten the headset on many types of bikes, including BMXs.
- Step 3
When you have finished the second step, you can tackle the third and rest your feet on the floor in order to make sure that it touches the base of the tire to stop them from spinning. In order to align your handlebars with the chassis of your bike, grab onto them with both hands and rotate them in the appropriate direction.
Once you’ve done that, bend across your bike and look at the top frame to check if it’s perfectly aligned. Once the handlebar is correctly positioned with the frame, you should strike it gently with your hand if needed.
- Step 4
You should proceed to tighten the handlebar screws after the handlebar has been placed in the proper position. Make sure not to overtighten the bolds when doing this. Make careful to use a reasonable amount of force when you tighten the headset screw until it is entirely and firmly secured.
Grab your handlebar clamp bolt, put it back to its initial position, and then continue tightening everything down using a reasonable amount of force.
What Causes the Handlebars on The BMX Bike to Keep Moving?
Poor interaction between the handlebar and the stem constitutes the most common explanation for the motion of BMX bike handlebars. Slipping results from this, which can be dangerous in addition to being unpleasant whenever you are riding. Your BMX bike’s handlebars could suddenly slip forward, which might also cause a mishap.
The following factors are the causes of the handlebars on your BMX bike moving:
- The paint that has scraped from the gripping on the stem is smeared in paint flakes, which makes the metal components less gripped because their marking is no longer visible.
- The stem faceplate’s hold on the handlebar may be unequal if the stem is inadequately tightened. The handlebar could even be smashed as a result of this.
- The handlebars on the BMX bike are flattened, and their once-round shape has been altered to one that mimics an oval, reducing the friction the handlebars make with the stem. As a consequence, the handlebars’ threading becomes worn, which makes it hard for the handlebars and stem to retain a firm grip.
How can you determine whether your BMX bike handlebars must be replaced?
You will regretfully need to buy a new pair of handlebars if the BMX bike’s handlebars are broken, scraped, or ovalized in any way, shape, or form. Fortunately, there is a wide range of brands, styles, and prices that you can pick from.
Your local bike store can assist you in determining which one best suits your requirements in regard to your bike, biking style, and finances. You can carefully examine your handlebars after detaching them from your bike by paying close consideration to the shape of the handlebar’s core contact point.
Check the shape with your fingers to see if it is entirely round or whether it has been flattened and has been ovalized. Any modification to its shape makes it unsuitable and unsafe for use.
Fixing a BMX bike handlebar that isn’t facing in the proper direction
The majority of the time, this happens after an unintended dismount when you go back on your BMX bike and find that when you move the bars forward, you continue to ride in loops.
To line up the handlebars, you will need to unscrew the bolts, hold the stem against a steerer rod, and then read just the handlebars. It might be beneficial if you did not press the handlebars back into their original position. You can then proceed to tighten the bolts once that is done.
Typically, standing over the front wheel of your bike while looking backward is considered to be the ideal position to deal with this problem. This is due to the fact that from there, you can adequately hold your wheels with your legs, enabling the bars to fall into line and become straight.
What height should BMX handlebars have?
In a perfect world, the sort of BMX bike you own will determine the height of your handlebars. For the best implementation of jumps and tricks, your handlebars should be low if you have a professional BMX bike, for instance.
On the other hand, if you have a race version, you can set the bar a little bit higher. Despite your height, you should keep the elevation of your BMX handlebars to no more than 10 inches. Generally speaking, when your height is 5 feet and more, your handlebars ought to have a rise of 3 to 5 inches if you have a junior frame and no more than 10 inches if you are using a professional frame.
How would one determine the height of their BMX handlebars?
Following the instructions below will enable you to figure out the proper elevation of the handlebar raise:
- Necessities
- measuring tape
- penetrating oil
- screwdriver with a flathead
- Take the BMX handlebars off.
It would be best if you first used a flathead screwdriver to loosen your handlebars so that you can measure their height.
- Sliding Your Brakes
Move the brakes to acquire a firm grip on the bike handlebars once they are loose.
- Apply Some Penetrant Oil
Pour penetrating oil liberally once the brakes have moved away from the grips on the handlebars. When you turn your handlebar grip and brakes back into alignment, the lubricant will lube and prevent them from deterioration.
- Determine the width of your handlebars
The width should be determined first, then the handlebar rise. A tape measure can be used to do this. Cross the handlebar with the tape measure from one edge of the flat bar to the other one. Make sure the measuring tape is level before measuring the width.
- Determine the height of your handlebars.
It’s time to figure out your handlebar rise once you have the correct width. You should keep in mind that how comfortable your bike ride is mainly based on how high your bike handlebars are. Typically, the bottom bar center and the straightedge are where your handlebars begin to rise (handlebar end). For the majority of standard BMX bikes, their handlebar rise is actually around 8.8′′ and 10′′.
What is handlebar rise in BMX?
From the middle of the clamped zone to the middle of the tip of the bars, the rise, also known as the height, is determined.
Expert riders often rise by 8 inches, cruise riders rise by 5 to 6 inches, and beginner riders rise by 2 to 6 inches.
Does BMX benefit from larger bars?
The broader the bar, the less effort it takes to turn it, but the wider the bar, the more mobility is needed. The rider should therefore feel steadier the wider the bar is.
The smaller the bars, on the other hand, the less stable the bike will seem, as well as the fewer movements the rider must perform to turn.
Conclusion:
As a BMX rider who has experienced riding a bike with a looser handlebar, you realize how unsettling the overall experience can be when handling the bike. Now you know how to tighten BMX bike handlebars. A rider’s worst nightmare, especially when traveling swiftly, is a loose handlebar. But you can always resolve this problem by taking the suggested actions. The best aspect is that the procedure is simple to follow and feasible even for a beginner.