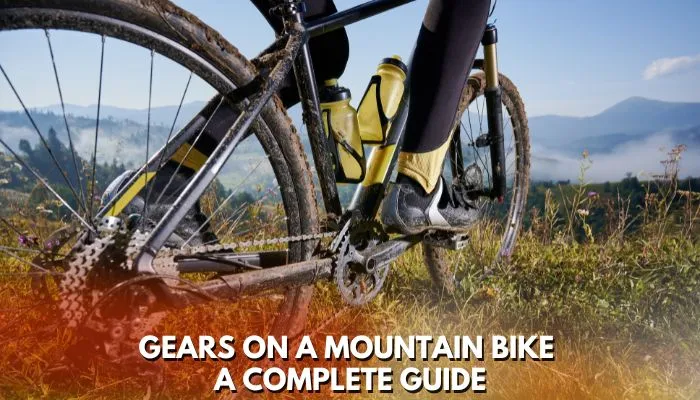
Gears On A Mountain Bike | A Complete Guide
The gears on the mountain bike might be bewildering if you are inexperienced in biking. Whether you are coming from a road bike or an outdated mountain bike, there are a number of differences that may seem odd in relation to the drive systems you are accustomed to.
However, the true purpose of mountain bike gears is still being determined by some people. How to use gears on a mountain bike? You could find yourself thinking about these questions rather often. The fundamentals of mountain bike gears are discussed in the paragraphs that follow.
As technology has advanced, gears have only gotten much better. Long gone are the days of loud grinding and dropped chains, and in their replacement are one-chainring (1x) systems that are sleek, efficient, and durable.
Table of Contents
How to Use Gears On A Mountain Bike?
On a mountain bike, the gears generally range from 7 to 36. Try to predict when to change gears before you really need to. Either before an incline or a decline, get prepared for a shift. By practicing with them, you may enhance your capacity to employ specific gears in various types of terrain.
The quick response is yes, but the material accompanying it will tell you everything you want to know about mountain bike gears, such as exactly what they are, how they operate, which kinds to use on different types of surfaces, and how to make them spotless. Hence, they last an extremely long time.
How Many Gears Does Your Mountain Bike Have?

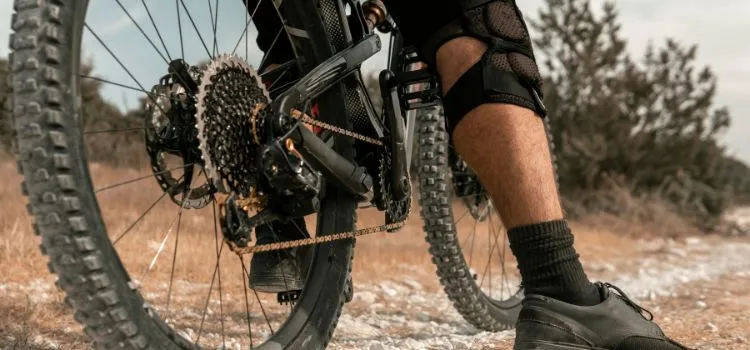
Start with the items you have on your bike. First and foremost comes the chainrings. Everyone is aware of chainrings since almost everyone has encountered a loose chainring when riding their bike as a youngster.
The amount of chainrings on the front and rear of mountain bikes, though, distinguishes them from others. In comparison to more modern bikes, which typically only have one or two, vintage mountain bike models usually contain three or more chainrings on the front.
These chainrings are available in a variety of sizes based on the number of teeth they have. The number of teeth increases with the size of the chainrings; likewise reduces with the size. Typically, sizes between 30T and 42T are the most widespread.
The cassette is made up of the seven to twelve gears, also referred to as “cogs,” that are commonly found in the rear gear (what such a tongue twister!). The range of cassettes can be somewhere between 11 and 42 teeth (T) and 10 and 50 teeth (T), in which the first number represents the number of teeth in the cassette’s smallest cog. The number of teeth increases as the number of cogs does.
What Is The Best Way To Determine How Many Gears Your Bike Has?
Let us perform some basic math: Add the number of front chainrings to the number of gears in the rear cassette. There seem to be 20 gears on your bike if it has two front chainrings and a rear cassette with 10 cogs.
How do the Gears function?
After describing gears and explaining their quantity and placement, let’s go on to the meat of the matter and look at how my bike is maintained in good condition. If you find yourself in a jam, it’s better to know how gears work so you can figure out why they’re not functioning on Earth.
This understanding might not be the most spectacular to have, but if you catch yourself in a jam, it’s more beneficial to understand how gears work.
Okay, so here’s how it works: The crank arms start to rotate when you put foot pressure on the pedals. They cause the chainring to begin spinning because they are attached to it.
The rear gear rotates as a consequence of the chainring in action. The rear wheel starts spinning as a consequence of the movement of the rear gears, completing the process.
You are up and moving swiftly! That wasn’t really as difficult as it sounded, was it? And now that you realize how it works, you can walk outside and inspect your bike to observe the actual process in operation, which helps make fixing your bike considerably easier.
How To Change Gears?
So, have a look at these and learn them before you ride that bike! Clicking the shifter won’t necessarily work; it’s not really like operating a conventional bike, a motorcycle, or a car. You must also be capable of shifting gears as needed.
Your indication to change gears is when you’re having difficulty pedaling, whether it will be because it’s too easy or too challenging.
- Start slowly while changing into gear for the first time when you are just trying to see what shifts will work and what shifts won’t. Continue to ride until you achieve a comfortable tempo and balance. It is indeed necessary to use a larger chainring if you’re on a level area. When you’re biking long and hard, keep in mind not to shift gears.
- The front shift will place you in middle gear, which will help you ride on soft soils and climb in windy weather, so ensure to utilize it if you need to change the chain to the middle chain ring.
- If you’re shifting, bear in mind to shift-click since doing so helps the movement in a chainring. You are shifting a gear results in a change in the gear’s stiffness.
- Right-shift from front gear to the big chainring while in middle gear on the rear cassette to change to high gear.
- Choose to have lower gear when you are reaching the mountains or when you are ready to begin biking uphill. Frequently shifting gears when ascending a hill or using a high gear will just place too much stress on the chainring, resulting in it falling and producing a large number of sounds you don’t want to listen to on a mountain.
Techniques for Shifting That You Must Understand
Knowing when you’re about to shift while riding is a smart practice since you can then shift into the correct gear before it’s essential. Try to plan your movements in advance before you meet the obstacle, regardless of whether it’s an uphill or downhill.
Rear and front gears shouldn’t be swapped at the exact same time. However, shifting them concurrently will put too much stress on your multiple chainrings. Of course, it is perfectly possible to change one after the other.
Be careful not to overburden any front chainrings on modern bikes with multiple chainrings by adopting all required precautions to prevent doing so. By cross-chaining or coordinating gear changes, this may occur. Treat them with tender care if you would like them last for you for a long time.
When Do You Change Gears?
A typical mistake made by most inexperienced mountain bikers is the assumption that they should shift gears when they are applying force on the gears, such as riding uphill or braking downhill. In reality, that is strongly discouraged.
Yes, it would be best if you pedaled to keep the chain tight, and pedaling is what enables the chain to weave into the subsequent cog. Yet, if you try to switch into a different gear as the chain is looping onto the cog, it is as if you are pleading with the chain to execute all of your duties for you. It does, in fact.
Utilizing a power stroke is the preferred approach to get around this. In essence, a power stroke would be when you press forcefully for one or two pushes, accompanied by mild strokes. It doesn’t appear as frightening as it sounds.
You immediately shift into a different outfit during the gentle pushes. Based on where you are, you can continue pedaling furiously or press the brakes after the chain has shifted over and become attached to the following cog and your gear has changed.
How to Choose the Right Gear
Okay, so your bike, the terrain, and your riding technique will all have a significant impact on the method to evaluate the answer to this question. Someone has misled you if you are riding a bike to a mountain slope that is famous for its smooth roads but using high gears.
It’s rather simple and clear: do you have a lot of inclination rising to accomplish? Take the low gear. Do you have a lot of biking in declining and down a steep?
Choose a high gear. Even though it’s not complex, if you go into a scenario without even doing your research, you might quickly be taken advantage of by a salesman.
How to Take Care of Your Bike Gear
It might be a matter of life and death to have gear that has been brought up to date with upkeep. When you devote a certain amount of time, emotion, and money to your mountain bike, you expect it to last for a great many years. This is what adds to the lifespan of your bike.
Since the drivetrain is usually the dirtiest element of the bike if you let dirt and grime build over time, the gears will only shift as easily as they once did, and the chain rings will be more likely to crack more regularly.
However, do not worry! Take a nice brush and some warm, soapy water, and begin the process. Be careful not to damage corners while washing the gears since smooth changes will make for a better riding sensation. If you’ve really let that filth build-up, you would need the support of a cleanser to assist in scrubbing everything off properly.
If you’re truly devoted, spend a lot of money on tools specifically made for mountain bikes. While some tools come with brushes that have curved tooth sections to access all of the small, tiny crevices, some items come with brushes that can reach all the way between those your gears to wash them up and make them clean and sparkling.
FAQs
When riding a mountain bike, when should you change gears?
Be prepared for the terrain. Not halfway up whenever you’re slowing down quickly and placing the most pressure imaginable on the pedals, but shortly before you start mounting, it is the time to switch. In the case that you must switch gears while going up a steep hill, do it gradually and momentarily loosen your grip on the pedals.
How should a novice rider change gears?
The chain will be moved into a bigger, simpler gear in the back (right hand) and a bigger, harsher gear in the front (with two clicks) with a prolonged push (left hand). The chain may be changed into a smaller, harsher gear in the back (right hand) and a fairly small, softer gear in the front with a fast push (and one click) (left hand).
What gear do you use to ride a bike downhill?
You could be thinking, “Well, What gears should I shift into when riding downhill? When riding downhill, it’s best to have a higher gear ratio since it will enable you to move more quickly while maintaining some pedal pressure. This may be accomplished by using a taller front and a smaller rear.
In third gear, can you climb a hill?
For terrain with some incline, third gear ought to be sufficient. However, you’ll have to downshift rapidly if you lose ground or your engine begins to suffer, as indicated by a screaming and wailing sound.
Conclusion
Now that you’ve read this, you are completely aware of how to use gears on a mountain bike and how to do it effectively. Because they were designed to make climbing mountains simpler, the gears will last a long time for you as well as your bike if you use them sensibly.
You’re absolutely right; the world of bicycles offers an incredible array of options to suit every rider’s preferences and needs. From the material and size of the frame to the wheel size, handlebars, gear lever, and brakes, there’s a lot to consider when choosing the perfect bike.
Here are a few tips to help navigate these options:
Define Your Riding Style: Start by identifying your primary riding style. Are you into road cycling, mountain biking, commuting, or something else? This will narrow down your choices considerably.
Frame Material: Consider the pros and cons of different frame materials like aluminum, steel, carbon fiber, and titanium. Each has its own unique characteristics.
Wheel Size: Wheel size can significantly impact the ride quality and performance of your bike. Larger wheels roll over obstacles more easily, while smaller wheels offer nimbleness.
Handlebars: Choose handlebars that match your riding style. Drop bars are common for road bikes, flat bars for hybrids, and various types for mountain bikes.
Gearing and Brakes: Think about the terrain you’ll be riding on. Different gear systems and brake types are better suited to various conditions.
Test Ride: Whenever possible, test ride a few bikes to get a feel for their comfort and handling. This can make a world of difference in your decision-making process.
Consult a Bike Shop: Don’t hesitate to visit a local bike shop. They can provide valuable insights, recommendations, and help you find the perfect bike.
Remember, there’s no one-size-fits-all answer when it comes to choosing a bike. It ultimately comes down to your individual preferences and how you plan to use the bike. Enjoy the process of exploring your options and finding the ride that’s just right for you!
If you have any specific questions about choosing a bike or need advice on any particular aspect, feel free to ask. We’re here to help you make an informed decision.
Happy riding! ?♂️?♀️